Thursday, November 29, 2012

Swirly Thank You

A classic two tone Thank You card. Not sure if the paper is Heidi Swapp or not, I have had it that long,but the cardstock is Close to my Heart's Cocoa color. Some swirly stamping on the cardstock and fun elements as a whole.
I cut the plaque with Cricut - Art Philosophy, then used the layer function and cut the 'Bamboo' color. Used a piece of Bamboo to showcase the Basic Grey RubOn and embellished with Close to my Heart's Opaque pearls.
To finish the card we used the negative from the Bamboo layer on the inside so people could write thier names and it's stylish!

Grace-ful Thank You

I love the bold colors in this card, the paper is Close to my Heart as is the cardstock stickers, stamp and embellishments. I also used Close to my Hearts Cricut Cartridge - Art Philosophy for the great layered tag in the center.
I first started by distressing the background, using the CTMH sanding paper, I distressed all the paper. It creates the great denim, rough feeling which goes with the rich fall colors of the paper.
Close to my Heart usually has coordinating cardstock weight stickers along wth other coordinating products. Here I used the coordinating cardstock stickers and Antique Copper Brads to punch the rough, mascuine feeling in the card.
Here is where the masuline feeling gets thown out the window with this great cardstock weight Heart sticker, so cute, I just couldn't resist.
And we fnish it all off with the inside of the card, a great blue (Twilight Blue), with cardstock sticker and Close to my Heart stamp in Cocoa Brown.

Framed Thank You

This next Thank You Card is part of a Heidi Swapp design paper. I took my favorte element on the page and used it the main focus on the card.
This stripey grey and the off white/ivory/gold shiny ribbon and Rhinestones seem to be the trend lately, unusual color combinations. I also used a Basic Grey Rub On for the Thank You, relatvely simple but kinda elegant.
Let's see what the next card has to offer..

Fully Thank{Full} Card

Thought this monthe I would do a series of just Thank You cards. I had fallen in love with Basic Grey's Mellow Collection, with the colors, images, design, everything. So when I had some pieces left over I decided to make a great card.
I had just enough cardstock to do a long side fold card, I also purchased the coordinating die cuts, so I punched out the flowers on the sheet. Layering the flowers and popping a brad in the middle, I misted them with water and started squeezing and pushing the petals into place, the out come is this great 3D flower on the front.
In my stash was some random Creatve Memories stickers and there I found the perfect sentiment. I finished the card front with some cute amber jewels highlighting the great images in the paper.
Lately, for me, a card is not complete without some paper on the inside too. It uses up the extra pieces I would have normally thrown away and it looks pretty.
A success I think, I just wish I had more of that paper...

Sunday, October 28, 2012

Rylie Nola - More to Adore Layout


I have started up my scrapbook classes again here in Yuzhno and for the second class we did a really sweet layout using Close to my Heart's More to Adore discontinued paper pack. My daughter Rylie was born in 2010 and I had yet to scrapbook her pictures, I know, bad me! But I fixed up my pictures and changed them to sepia toned which suited the paper pack perfectly.
I used my Gypsy to cut out the letters, Gypsy Font I used, then I welded the letters together so they would cut as a single piece. I inked every single piece of paper and placed my pictures down, then I cut out a locket from ...well, I can't remember. But it all turned out very sweetly if you ask me. I cut the paper for next class already so stay tuned for the next awesome layout.

Trendy Chevron Thank You Card

Trying to get back into a routine since summer so I might have a bunch of posts in a row. I have been busily making cards and other goodies for the upcoming Christmas Bazaar here in Yuzhno, mostly cards as my focus will be on the kids section of the bazaar. But I have got to make something, my creative juices continue to flow! So with the trend of chevron design I decided to make a chevron using a diagonal design I had in my stash.
I also had a great Thank You rub on from Basic Grey in my stash as well. So with the help of adhesive pearls and cardstock from Close to my Heart a great monochromatic card was created.
I hope it sells for charity and I have many more cards to show you.

Tuesday, May 15, 2012

Sarsparilla Class Layout

On to the next one! I quite enjoy planning class for our scrapbook group, it's kinda like a puzzle, what to do here, what goes there. I also like to do different layouts for different papers, case in point, our next class I used Close to my Heart Sarsaparilla paper pack. Sarsaparilla has some great cowboy elements, I tend to like the flourished that are through out the papers.
This layout if from the CTMH layout book called Imagine. The name of the layout is Role Play and it boasts 8 photographs. I actually had a hard time finding my event that had 8+ pictures in it. But once I found it, everything fell into place. We ended up going to Evans Mountain in Colorado which, I believe, had the highest point in the Rockies that you could drive up to. This river area was near the top. I did happen to get some great pictures of our little trip and loved the way they play with the paper.
To keep with the 'natural' photos and theme I added these great twill ribbons to lighten and add some horizontal lines to the page.
I was looking for something fun to put on the page to capture the eye. I have the matching CTMH Acrylix Stamp called 'Western Flourishes' and stamps those great stamps in some of the white space.
Next I broke out the Cricut and cut a fun title from the Country Life Cartridge and chose 'Cool, Clean Water', to reflect the water in the pictures. I really like the way the layout turned out, of course after the class is done I will add some extra embellishment to make this layout uniquely mine.

Sunday, April 22, 2012

Mojo Monday Challenge #237

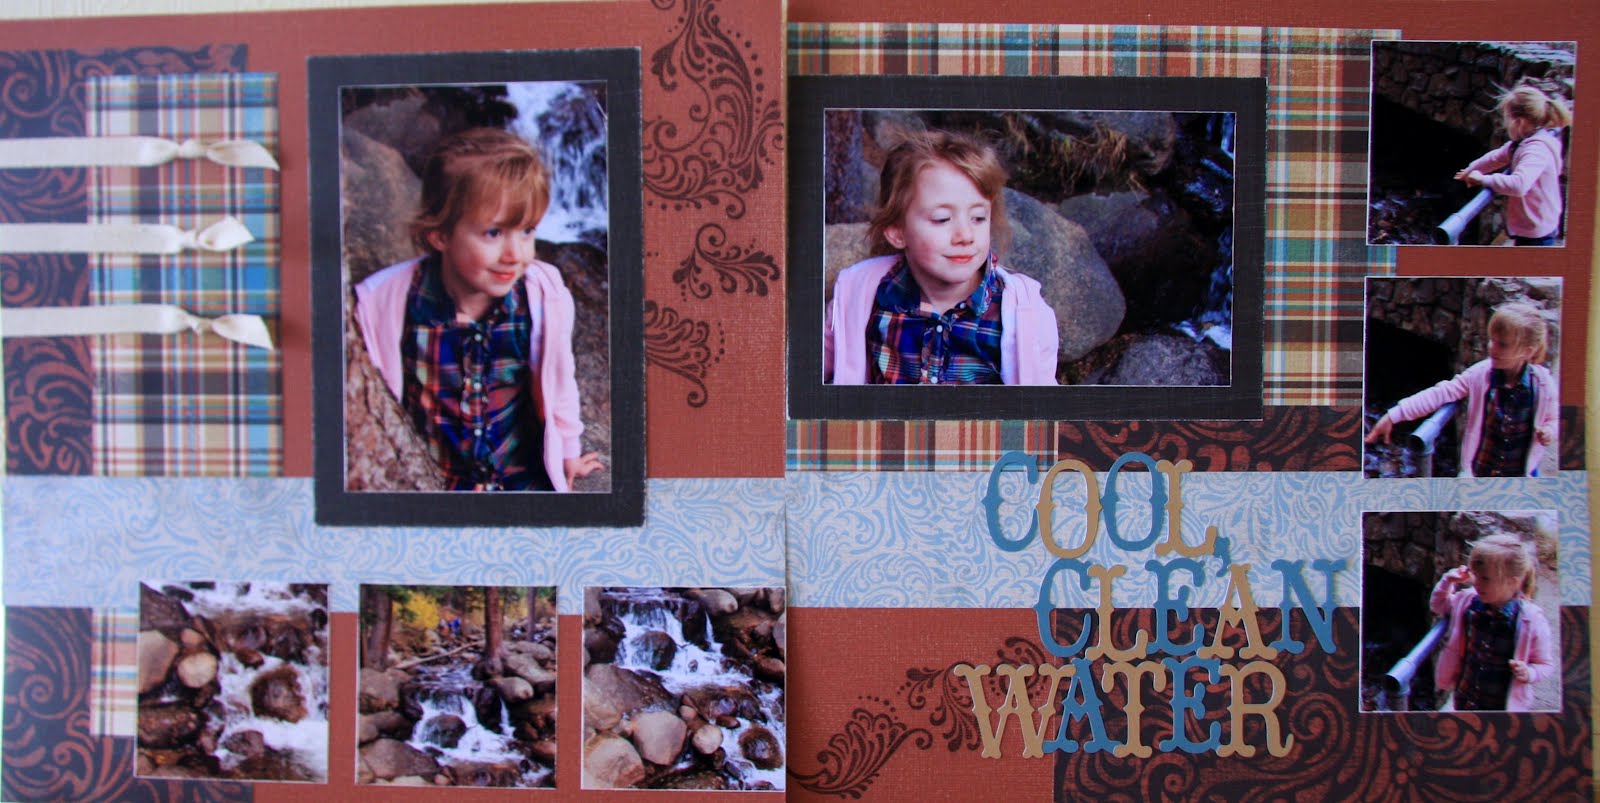
Up for the next challenge was Mojo Monday, and thier latest sketch. A cute little sketch and everyone one loved it there are lots of entries. I was having a challenge figuring out what to do with 4, not 3, jumpy circles? I could do flowers, but most of the ladies did those, I could do the actual circle, too cliche, or I could do butterflies? To many ideas, I ended up thinking about it for a day and realized that what hangs not at the same level are lanterns, the are never just in a straight line, so with some asian inspiration I dug out my Pagoda cricut cartridge.
There are awesome lanterns, dolls, fish lanterns, pandas, anything with an asian theme you can think of on this cartridge and other than this card I have used it once. It was a great layout that I will probably post another day but hopefully soon we will visit China or Japan and that cartridge will be smoking that day! :)
It is also full of Kanji characters, each page has a different word, and even though there is no birthday...celebrate is a great way to say happy birthday anyway, or anything else for that matter.
It was looking pretty plain with just the paper so I decided to add some jewels, maybe it kinda looks like fireworks, too much Kung Fu Panda for me, and sprinkled them around.
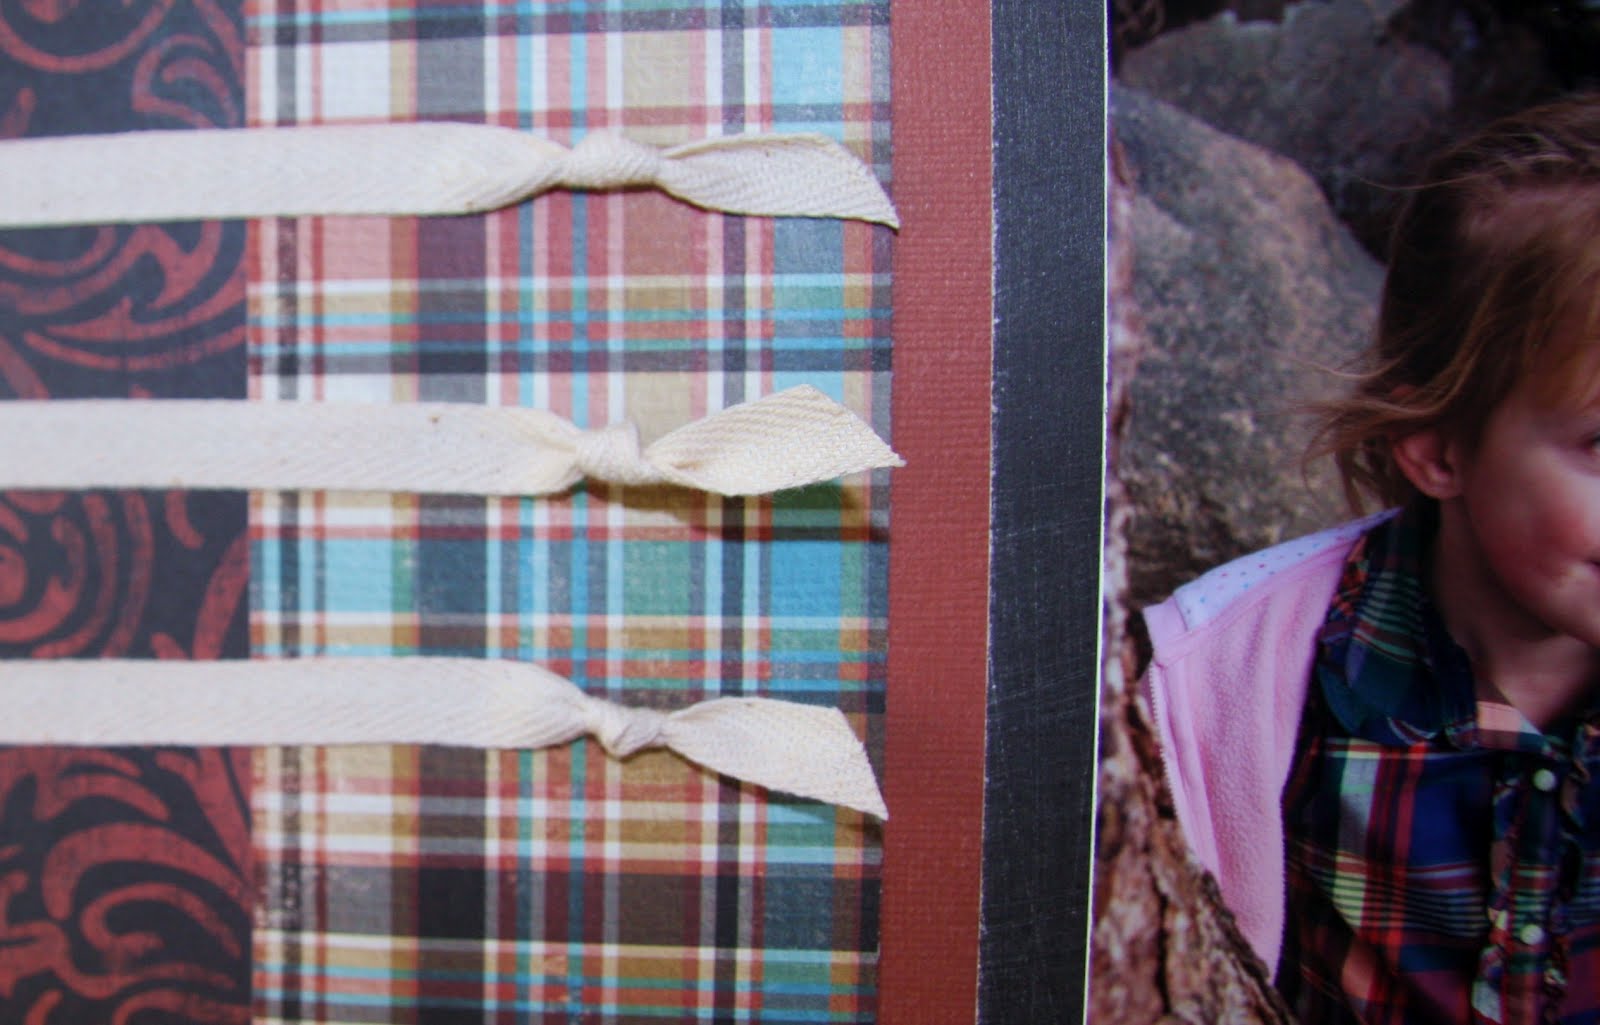
Last but not least, I looked at the sketch again and saw that it needed a label or ribbon down near the bottom, but I wasn't going to put any words on the front, so I was thinking I needed a fan, but where would I find that? So next idea, I had some wider red grosgrain ribbon and ended up folding that across the card for an awesome pop of color.
All in all I thought it turned out pretty nice, even with all the thinking going on. Want to play the next card challenge? On Mondays of course, see the next sketch -->HERE

Friday, April 20, 2012

Clean & Simple Challenge #185

I ended up joining some challenge sites lately to get some extra inspiration. One of them was Clean & Simple, no prizes but fun layouts, all cards so that should get me back up to my old stock level of cards as our Happy Hobby craft show wiped me out. This is the sketch:
A simple sketch but with endless possibilities, if you want to see what others have made with this sketch you can go HERE!
This is my version I put my self under the wire to make this card so with a little help from my cricut and Graphically Speaking cartridge I think it came together. I also have limited ribbon here and had to choose colors that went with my ribbon.
And of course the inside of the card can not be naked so with the leftover papers I put the rest of the sentiment on the inside!

Tuesday, April 17, 2012

Floral Tapestry Class

Finally ready to get back in the swing of things, after the great Happy Hobby Craft Fair, many ladies here in Yuzhno have signed up for my email list promoting classes in one craft or another, first class is from my favorite, scrapbooking,
What a great way to display pictures of your vacation, wedding, baby or life in general. This layout is about one of the most monumental days a kid can have, first day of school. Seeing as how the Yuzhno scrap booking stores are less than impressive and more expensive than my first born, I am providing all basic materials for this class, yes I still have a bunch of paper from when I was a Close to my Heart Consultant so as long as a dedicated few ladies want to learn, I have the materials. I have chosen a discontinued paper pack called Floral Tapestry, mostly because I want spring to be here, it is mid-April and there is still lots of snow on the ground but the temperatures are rising, we had to dig out the bikes this last weekend. The Layout was chosen with great care to incorporate different size pictures and/or use pictures printed with all the same size, I steered to my Magic book by Jeanette Lynton, which has awesome scrapbook recipes in it. I decided to pre-cut all the paper for this layout with minimal variations between the kits. Each person will get a 'kit' with the paper, cardstock, and any other extra pieces that are needed for this project.
We will also use Close to my Heart's Bohemian Alphabet for our titles, and all ink, blocks and stamps are shared. The other fun thing with this particular paper pack is that it originally came with multiple sheets of 'My Stickease' that coordinate with the paper pack, you can see some sticker photo turns at the top, near the title and in the next close up are some fun circles.
Lately, after I complete a layout I have been making a card or two with the leftover scraps, none is made as of yet BUT soon I will have a great little card for a birthday or something. Also the current embellishments on this page aren't quite what I like to put on my page, but they are the perfect simple accents for begginners which is what most of the class will be, so I plan on pumping up the embellishments to my satifaction, I am thinking of posting a before and after shot to see the difference. What do you think?

Sunday, March 18, 2012

Tasty and Functional

I have been very busy making lots of cards and layouts so I thought it was time for a change. I found this great craft on the Cricut Message boards and had to use it. These are clothes pin magnets topped with fruit from the Preserves Cartridge and matching recipe cards.
I actually have 3 sets of these, this is just the green fruit, there is also a red one and a variety fruit set. I like the green one because it is my favorite color and all the fruits look really great, such a variety on this cartridge.
Obviously one of the apples, there are five different apples on this cartridge, each with it's own distinct design, great for any fruit related project.
One Great Kiwi, which is alot of work with all those seeds, but looks really great.
And a great pear, this is one of four pears on this cartridge and they are all very cool. You might be able to see the dots all over the fruit, I am limited to what I brought to Russia and can't get anymore papers and so on, so I had a great Close to my Heart background stamp and watermark stamped each layer of the cuts. Yes, it was a lot of work but it looks so much better than plain cardstock don't you think?
Finished off with matching Recipe cards, each design on the card was masked using the negative cutout from the fruit, a kind of stencil in with green ink, then topped off with a great flourish stamp from Close to my Heart. They are really cute and useful, I am hoping that they will make a great gift!

Tuesday, March 13, 2012

Provincale Fair Flair

Just a quick little post about this card, I finally made a layout and a card using the Provincale Fair paper line from Tinkering Ink. I have been holding on to this paper for about 3 years and was not sure what I was going to do with it. It ended up making the most beautiful layout and I was amazed by this little card. I am totally in love with the line drawn flower and painstakingly cut as many as I could out of one of the sheets. Then another paper had this great huge swirl across it, which made me fall even harder. So with the last cut flower and a small piece of patterned paper I created, what I think, is a beautiful card. Just pretty enough for any deserving person.
Even though it didn't really need it, I added some bling to my card, I had some dark blue Gemstones from Close to my Heart and sprinkled this card with them.
Then I added a great stamped 'Happy Birthday' in Outdoor Denim courtesy of Close to my heart and added some subtle touches like die cut flourish from the Elegant Edges Cricut Cartridge. I am falling again for this card and am happy that Plan A is taking effect, to use up my current stock of scrapbook supplies before I go home to Canada...I am well on my way!

Tuesday, March 6, 2012

Birthday Bash of a Card

I had gotten the Birthday Bash Cricut Cartridge before we left for Russia, so I had had some time to play with the cartridge. I would cut some words here and there, as we have seen in a previous post, but it was time to really dive into the full potential of this cartridge. I am only showing you the card today, but, I had also made a layout using this Imaginisce paper called All Kinds of Happy. With the leftover paper I made this fun card, good for boy or girl, with the cute dog in the party hat.
After I pieces the dog together, I thought, 'How Plain.' and leaving my Cuttlebug back home in Canada I had to improvise, so out came the stickles! The paper already had little shots of glitter everywhere...I was just improving the overall look of it! Pop that dog on a handstand up with 3D foam tape and we had the start of an awesome card.
To finish it off, I wanted the card to stay gender neutral, so ribbon was out. The coordinating pink dots was the back of another paper in that line and top it all off with a trio of buttons.
Let's not forget the inside of the card, this cartridge features a phrase function and it is awesome for all the words that say Celebrate! I choose the party hat to go with my dog and the little 'to' just cut right along with the phrase. As my Daughter would say 'Easy Peasy, Lemon Squeezy!'

Monday, March 5, 2012

A 'Bliss'ful Layout

Yesterday I caught up on my picture taking...I had sooo many layouts and cards that needed to be photographed that it took me most of the afternoon. But, now caught up, I have a load of pictures to post for you!!! I decided to start with a layout, lately while perusing the blogosphere, I realized that there seems to be a shortage of layouts posted. I still love to use Close to my Heart Scrapbook Layouts, they are clear and I DO always get a great layout, I am no longer a consultant but still love all things Close to my Heart. This layout is all CTMH except 6 little buttons and Tattered Angles Glimmer Mist.
A really sweet layout for either a B/W baby photos or Wedding pictures, it is dreamy and soft, perfect for those pictures. I did lots of different techniques on these pages,
I tried to layer lots, so I first took CTMH new Cricut Art Philosophy Cartridge and cut a large Medallion, then I used that medallion as a mask for both pages, layering Tattered Angels Glimmer Mist, Coffee Shop/Creme de Chocolat/Pearl over the mask.
I used the same on a Tattered Angels Flourish Mask on a photo mat, punched my scalloped strips with a Martha Stewart punch, Inked all edges, added CTMH crochet ribbon and generic buttons, but it still needed something...
So I cut up the mask I used and used the pieces to embellish this great layout. I am not sure if I should classify this as Shabby Chic or Romantic, but I love this layout and will use my Cricut to make many more masks!!!!